
Last Updated: October 23, 2026
Quick Summary
Securing emergency equipment on construction sites means placing gear where the hazard is, keeping a clear path at least 3 feet wide to every station, and marking each station with a sign visible from 20 feet away. Lock small PPE in a gang box, anchor cabinets and first aid stations, and inspect everything on a written schedule so gear stays stocked, accessible, and ready.
- Build a jobsite checklist with one row per item covering quantity, location, owner, and replenishment trigger.
- Mount fire extinguishers along normal travel paths, one within easy reach of every hot work area and fuel storage point.
- Store harnesses and lanyards out of sunlight and moisture, since sun rots webbing over time.
- Log each inspection with date, item, pass or fail result, and inspector initials, and tag out failed gear.
- Run an emergency drill at least once per project phase so the posted plan gets practiced.
Table of Contents
- Why Securing Emergency Equipment on Construction Sites Matters
- Step 1: Assess Site Hazards and Select the Right Emergency Equipment
- Step 2: Build Your Jobsite Emergency Equipment Checklist
- Step 3: Place and Sign Emergency Equipment for Clear Access
- Step 4: Secure Equipment Against Theft, Damage, and Weather
- Step 5: Inspect, Maintain, and Replace Emergency Equipment
- Construction Site First Aid Kit Requirements and Emergency Response Plan
- Conclusion: Keep Your Emergency Equipment Ready Every Day
- Frequently Asked Questions
Why Securing Emergency Equipment on Construction Sites Matters
A worker falls from a ladder at 7:40 a.m. The crew knows a first aid kit exists somewhere in the site trailer. Nobody knows exactly where.
That gap is what securing emergency equipment for construction sites is really about. Equipment that exists but can’t be reached in seconds is equipment you don’t have.
Site Services USA understands how fast a site layout changes. Trailers move. Material piles shift. Access roads get blocked.
Three things drive this home:
- Falls remain one of the leading causes of death in construction, according to EXTERNAL_LINK: OSHA’s worker safety data | osha.gov.
- Emergency response time on a site depends on placement, not just supply.
- Damaged or missing gear is a citation waiting to happen.
Below are five steps that keep emergency equipment stocked, signed, and ready. The checklist in Step 2 is the one most crews skip, and the one that matters most.
Step 1: Assess Site Hazards and Select the Right Emergency Equipment
Start with a hazard assessment, not a shopping list. Walk the site, note what can hurt someone here, then match gear to those risks. A generic kit won’t cover a demolition site and a finish carpentry crew alike.
Work through the site in zones:
- Fall hazards. Roof edges, floor openings, ladders, and scaffolding. These call for fall protection gear and a rescue plan.
- Struck-by hazards. Falling debris, swinging loads, and vehicle traffic. These call for hard hats, high-visibility clothing, and barricades.
- Electrical hazards. Temporary power, overhead lines, and generators. These call for electrical safety gear and insulated tools.
- Confined spaces. Trenches, vaults, and tanks. These call for gas monitors, retrieval lines, and a tripod.
- Fire and fuel. Heaters, fuel storage, and hot work. These call for fire extinguishers sized to the risk.
Matching PPE and Rescue Gear to Task-Level Hazards
Personal protective equipment is the first layer and must fit the task.
- Hard hats for every worker under overhead work or falling debris.
- Safety glasses for cutting, grinding, and drilling.
- Gloves matched to the material: cut-resistant for sharp edges, rubber for wet work.
Rescue gear follows the same logic: a full-body harness and retrieval line wherever someone works at height or in a confined space, and a tripod and winch at every confined space entry point.
Build a hazard-to-gear map for each zone and post it in the trailer. When a task changes, the crew checks the map instead of guessing.
Step 2: Build Your Jobsite Emergency Equipment Checklist
A jobsite emergency equipment checklist turns a vague “we have gear somewhere” into a countable inventory.
Build it as a table, one row per item, with five columns: item, required quantity, location, responsible owner, and replenishment trigger. That lets a new supervisor verify readiness in minutes instead of hunting through a binder.
Here is a working template you can copy and adapt per site:
| Item | Required quantity | Location | Owner | Replenish when |
|---|---|---|---|---|
| First aid kit | One per crew, one per vehicle | Site trailer, each gang box, each truck | Site safety lead | Any supply below par level or expired |
| AED | One per site if required by contract or site size | Main entrance, second unit near far work zone | Site safety lead | Pad or battery expiry date |
| Fire extinguisher | One per hot work area and fuel storage point, plus travel paths | Mounted along normal travel routes | Competent person | Monthly visual fail or annual service due |
| Eyewash station | One within 10 seconds’ travel of chemical storage | Chemical storage area | Storage supervisor | Weekly flow check fails or water clarity drops |
| Hard hats, safety glasses, gloves, high-visibility vests | Par level by crew count plus 10 percent spares | Gang box and PPE station | Foreman | Count drops below par |
| Fall protection: harnesses, lanyards, anchor points | One harness per worker at height plus two spares | Dedicated harness rack out of sunlight | Competent person | Pre-use inspection fail or 5-year service life reached |
| Confined space gear: gas monitor, tripod, retrieval line | One set per entry point | At each permit-required confined space | Entry supervisor | Calibration due or pre-entry bump test fail |
| Emergency contact list and site map | One per crew and posted at each station | Trailer, gang boxes, stations | Site safety lead | Any crew, layout, or responder change |
| Emergency response plan | One posted per station, one in trailer | All stations | Site safety lead | Project phase change or drill finding |
| Spill kit and absorbent material | One per fuel and chemical storage area | Storage areas | Storage supervisor | Any use or damaged packaging |
| Stretcher and blanket | One per site | Trailer or rescue cache | Site safety lead | Any use or damage |
| Signs marking each station | One per station, visible from 20 feet | Each station | Site safety lead | Faded, missing, or layout change |
Count everything against the required quantity, not memory.
Assign one owner per row and one overall owner who signs the checklist at each walk, while row owners restock before the next shift.
Update the checklist whenever scope, crew size, or layout changes, one built for a three-crew fit-out will undercount fall protection and extinguishers once steel erection starts.
Keep the current checklist in the trailer and a photo of it on the site safety lead’s phone. When a station moves, update both the same day so the posted map and the working list never disagree.
Step 3: Place and Sign Emergency Equipment for Clear Access
Placement decides whether gear gets used. Put equipment where the hazard is, not where it’s convenient to store.
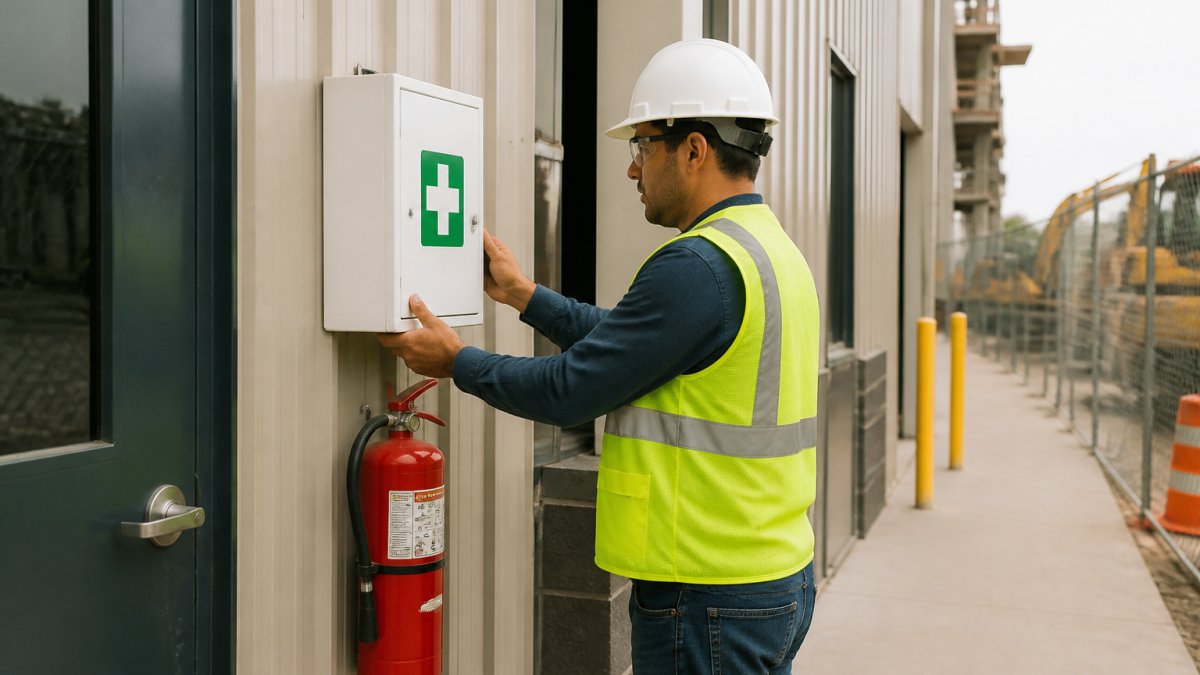
Follow these placement rules:
- Keep a clear path to every station, at least 3 feet wide.
- Mount kits and extinguishers at reachable height, not behind locked doors.
- Mark each station with a sign visible from 20 feet away.
Signs matter as much as gear. A worker who can’t find the eyewash station in ten seconds will rinse their eyes in a water bottle instead.
Construction Site Fire Extinguisher Placement
Construction site fire extinguisher placement follows a simple rule: one within easy reach of every hot work area and fuel storage point.
- Mount extinguishers along normal travel paths, not in corners.
- Keep them off the ground and clear of debris.
- Tag each one with an inspection date.
Check placement after every site layout change. What was clear last month may be a wall of plywood today.
Step 4: Secure Equipment Against Theft, Damage, and Weather
Gear that walks off the site is gear you’ll buy twice. Lock it, anchor it, and cover it. Job site theft is a real cost, and small items disappear first, gloves, safety glasses, and hand tools vanish fastest.
Use these habits:
- Store small PPE in a locked gang box.
- Anchor extinguisher cabinets and first aid stations so they can’t be moved.
- Keep harnesses and lanyards out of sunlight and moisture when not in use.
Weather does quiet damage: sun rots webbing, moisture rusts hardware, dust clogs monitors. Store gear as carefully as your power tools.
Leaving harnesses hanging in direct sun for months weakens the webbing. A harness that fails inspection gets removed from service, and that costs more than proper storage.
Step 5: Inspect, Maintain, and Replace Emergency Equipment
Inspection keeps everything else honest.
Use a written inspection log with four fields per check: date, item and serial or asset number, result (pass, fail, or removed from service), and inspector initials. Keep it with the equipment or in the trailer and review it at each safety walk, a log that can’t be produced on request is the same as no log.
Set the schedule by equipment type and by manufacturer instructions, whichever is stricter:
| Equipment | Check frequency | What to look for | Action if failed |
|---|---|---|---|
| First aid kit | Monthly | Missing or expired supplies, damaged case | Restock to par immediately; replace expired items |
| Fire extinguisher | Monthly visual, annual service by a qualified technician | Gauge in operable range, tag current, no dents or corrosion, pin and seal intact | Tag out, remove from service, replace or recharge |
| Harness and lanyard | Before each use, plus periodic competent-person inspection | Frayed webbing, cuts, rust, cracked hardware, illegible labels, impact indicator deployed | Remove from service permanently; do not return to the gang box |
| Gas monitor | Before each entry, plus bump test and calibration per manufacturer | Battery charge, sensor response, calibration due date | Recalibrate or remove from service |
| Eyewash station | Weekly | Water clarity, flow, expiration of flushing fluid | Flush, refill, and retest |
| Hard hats and safety glasses | Daily | Cracks, deep scratches, damaged suspension | Replace damaged units |
| AED | Monthly, plus pad and battery expiry check | Status indicator, pad expiry, battery expiry | Replace pads or battery; remove unit if self-test fails |
Tag-out makes the log real. When an item fails, attach a dated “do not use” tag, record the failure, and remove it from the site or lock it in a quarantine bin.
Service life matters as much as condition.
Calibration and service records belong with the equipment.
Train workers to inspect gear before use, not just on schedule.
A harness that has been involved in a fall must be removed from service even if it looks undamaged. Record the event, tag the unit, and replace it before the next shift.
Construction Site First Aid Kit Requirements and Emergency Response Plan
Construction site first aid kit requirements start with a stocked kit on every site and at least one trained person who knows how to use it, matched to crew size and hazards present. A basic kit covers cuts, burns, eye injuries, and sprains; add supplies for chemical exposure if the site stores or uses chemicals.
The construction site emergency response plan ties it all together. It should cover:
- Who calls 911 and who meets responders at the gate
- Where the nearest hospital is, with directions posted
- Who holds first aid and CPR training
Run a drill at least once per project phase. A plan nobody has practiced is a plan that fails under stress.
The best emergency plan is short, posted, and practiced. If a new worker can’t find the first aid kit and the muster point on day one, the plan needs work.
Conclusion: Keep Your Emergency Equipment Ready Every Day
Emergency equipment only works when it’s stocked, accessible, and inspected. That takes a routine, not a one-time push, and the hard part is keeping it alive as trailers move, crews rotate, and gear gets used up.
That’s where Site Services USA helps. We deliver portable toilets, dumpsters, temporary fencing, and storage containers nationwide, with same-day emergency service available when a site needs help fast.
Request a quote from Site Services USA and get the site services side of your safety plan handled.
Frequently Asked Questions
What emergency equipment should a construction site have?
At minimum, a construction site should have personal protective equipment (hard hats, safety glasses, high-visibility clothing, protective footwear, gloves), fall protection gear such as full-body harnesses and retrieval lines, a stocked first aid kit, fire extinguishers, and an emergency response plan. Sites with confined spaces or work at height also need rescue equipment like tripods and retrieval systems. The exact list depends on your hazard assessment, but every item must be inspected, accessible, and signed. Use a jobsite emergency equipment checklist to confirm nothing is missing before workers arrive.
How often should construction site emergency equipment be inspected?
Inspect emergency equipment before each use and on a regular schedule: daily for first aid kits and fire extinguishers (visual check), monthly for fall protection harnesses and lanyards, and annually for fire extinguishers (professional service). Damaged equipment must be removed from service immediately and replaced. Keep a written log of inspections, including the date, inspector name, and any issues found. Regular inspection catches worn straps, expired supplies, and missing items before an emergency, and it supports OSHA-compliant recordkeeping.
How do you prevent theft or damage to emergency equipment on a jobsite?
Store emergency equipment in locked, weather-tight containers or job trailers, and keep first aid kits and fire extinguishers in visible, signed stations that are still secure. Use cable locks or locked cabinets for fall protection gear and power tools. Assign a responsible person to check equipment in and out, and train workers to report missing or damaged items. After hours, move high-value items like harnesses and retrieval lines into a locked storage container. Quick access matters, but so does keeping gear clean, dry, and accounted for.
Where should first aid kits and fire extinguishers be placed on a construction site?
Place first aid kits in a central, easily reached location such as the site office or break area, plus one kit in each work vehicle and at remote work areas. Fire extinguishers belong within 50 feet of any flammable or combustible materials, near exit routes, and at least one on each floor of a multi-story site. Mount them at eye level, mark them with clear signage, and keep the path to them clear. Follow construction site fire extinguisher placement rules and check with your local fire marshal for additional requirements.
